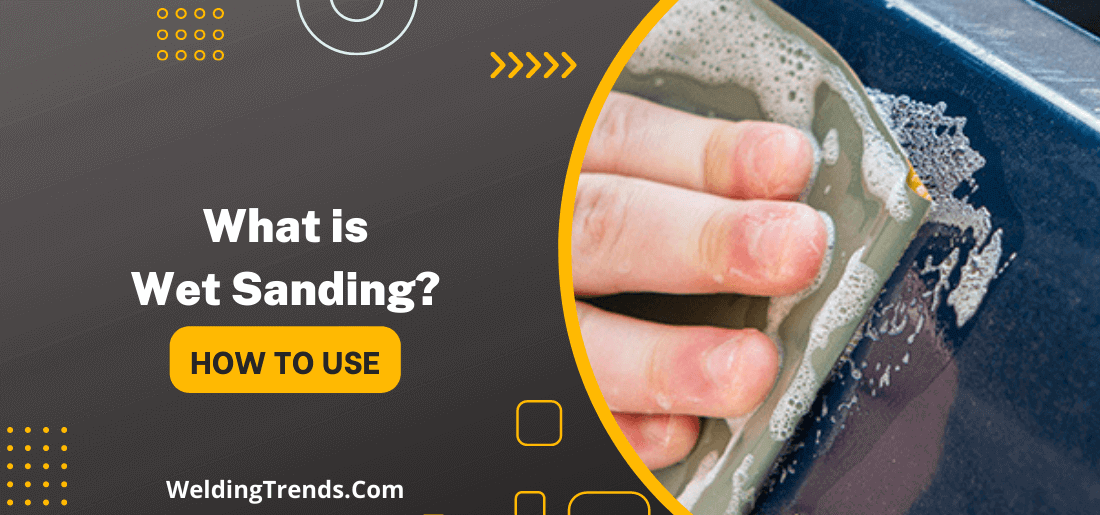
Wet sanding is the process of using water to help you sand a surface. This can be done with various tools, such as a power drill, mouse sander, or block sander. The idea is that the wetness will help reduce friction and make it easier to remove material.
Plus, it helps keep the dust down! Wet sanding can be used on practically any surface, from wood to metal.
Wet sanding also helps to create a smoother finish, which is why it is often used before applying a coat of paint or sealant. So, if you’re looking for a better way to sand something, give wet sanding a try!
What is wet sanding and what are its benefits over other sanding methods?
Wet sanding is a process of sanding that uses water to lubricate the sandpaper, which helps to prevent clogging and the build-up of dust.
This type of sanding is often used when finishing woodworking projects, as it produces a smooth, even surface. Wet sanding can be done by hand or using a power sander.
There are several benefits to wet sanding over other methods, such as dry sanding. Wet sanding produces less dust, so there is less clean-up required afterward. It also helps to prevent the wood from overheating and burning, which can happen with dry sanding.
Wet sanding also leaves a smoother finish and can help to fill in any small imperfections in the wood.
If you are planning to wet sand a project, it is important to choose the right type of sandpaper. Wet/dry sandpaper is specially designed for use in wet sanding applications and can be found at most hardware stores.
Be sure to follow the manufacturer’s instructions for wet sanding, as using too much water can damage the wood.
How to wet sand using the proper techniques and tools?
The goal of wet sanding is to remove the previous paint job while smoothing out any imperfections on the surface. This process can be done by hand, or with the help of a machine.
Wet sanding is usually done with finer grit sandpaper and progresses to a coarser grit if necessary. To wet sand properly, you will need:
- Bucket of water
- Sandpaper (grit will depend on the paint job you are trying to remove)
- Sponge or cloth
- Rubber block (optional)
- Begin by soaking your sandpaper in the bucket of water for a few minutes. This will help to prevent the paper from clogging up as quickly.
- Next, start sanding the area with wet sandpaper. Use long, smooth strokes in a single direction.
- Periodically dip your sponge or cloth in the bucket of water and wipe down the surface you are sanding. This will help to keep the area lubricated and prevent the sandpaper from clogging.
- If you are using a rubber block, make sure to keep it wet as well. This will help to prevent scratches on the surface.
- Continue sanding until you have achieved the desired results. Rinse the area with clean water and dry it off when you are finished.

Best finishes to use after wet sanding for a flawless look?
After wet sanding your car’s paint, you’ll want to use a high-quality polish or wax to restore the shine and protect the finish. For best results, use a product that is designed specifically for wet sanding. We recommend using Meguiar’s Mirror Glaze Ultra Finishing Polish.
This polish will remove any remaining sanding marks and leave your paint with a deep, glossy shine. It can be applied by hand or machine and will provide long-lasting protection against the elements.
Another great option for finishing off your wet sanded paint is to use a sealant. A good quality sealant will provide a durable barrier against the elements and help to preserve the shine of your paint.
We recommend using Meguiar’s Ultimate Liquid Wax. This wax is easy to apply and will leave your paint with a deep, lustrous shine.
Either of these products will give you the best possible finish after wet sanding your car’s paint. If you want to achieve a flawless look, we recommend using both products in conjunction with each other.
Also Read: Does Gorilla Glue Work On Fabric?
How do I avoid common mistakes made during wet sanding?
Wet sanding is a necessary step in achieving a smooth, flawless paint job, but it’s also one of the easiest ways to ruin your hard work.
These are some common mistakes made during wet sanding and how to avoid them.
1. Not using the proper grit sandpaper
If you use too much grit, you’ll end up with deep scratches that will be difficult to remove. If you use too fine of grit, you’ll just be wasting time as the sandpaper won’t be able to remove anything. Use a medium grit (around 1000) for wet sanding.
2. Not using enough water
If you don’t use enough water, the sandpaper will quickly clog and become ineffective. Make sure to keep the sandpaper wet at all times by regularly spraying it with water.
3. Sanding in one direction only
When you sand in only one direction, you risk creating swirl marks that will be visible once the paint dries. To avoid this, sand in a criss-cross pattern or use a rubber block to help evenly distribute the pressure.
4. Not using a sealant or polish after wet sanding.
If you don’t use a sealant or polish after wet sanding, all of your hard work will be for nothing as the paint will quickly become dull and unprotected. Make sure to use a high-quality product designed specifically for wet sanding to get the best results.
5. Not being careful around edges.
It’s easy to accidentally sand too deeply along edges and corners. To avoid this, be extra careful when wet sanding around these areas. Use a smaller sanding block or your fingers to help control the pressure.
By following these tips, you can avoid common mistakes made during wet sanding and achieve a smooth, perfect paint job.
FAQs – What is wet sanding?
Do you need special sandpaper for wet sanding?
No, you don’t need special sandpaper for wet sanding. You can use regular sandpaper, but it’s important to keep the paper wet so that it doesn’t clog up. Wet sanding is a great way to get a smooth finish on your project.
If you’re working on a particularly delicate project, you might want to use finer sandpaper. But for most projects, regular sandpaper will do the trick. Just be sure to keep it wet!
What does wet sanding do to wood?
Wet sanding is a process of using sandpaper with water to smooth down rough wood surfaces. This method can be used on both finished and unfinished wood. Wet sanding will remove any remaining varnish or paint from the surface of the wood and leave it with a smooth, even finish.
If you are planning on painting or staining the wood after wet sanding, be sure to let it completely dry before starting your project. Wet sanding can also be used to remove scratches from wood surfaces.
How do you wet sand by hand?
To wet sand by hand, you will need to use a piece of sandpaper and some water. Wet the sandpaper with the water and then rub it over the surface that you want to sand. The water will help to lubricate the sandpaper and make it easier to move over the surface.
Sand in a back-and-forth motion until the desired results are achieved. You can also use a spray bottle to keep the sandpaper wet if needed.
Will wet sanding remove paint?
Wet sanding is a process that can be used to remove paint from a surface. The process involves using fine-grit sandpaper to gently sand the paint away. This can be an effective way to remove paint, but it can also damage the underlying surface if not done carefully.
Wet sanding is not recommended for painted surfaces that are in good condition. It is best used on surfaces that have already been damaged by paint or other materials.
Can I wet sand with dry sandpaper?
Yes, you can wet sand with dry sandpaper, but it’s not the best option. Wet sanding will clog the paper and make it less effective. It’s also more difficult to control the sanding process when the paper is wet.
Bottom Line:
Wet sanding is a process that can be used to smooth and polish wood. It is done by using water to help the sandpaper move over the surface of the wood, which results in a smoother finish.
If you are interested in trying wet sanding on your projects, be sure to follow these tips: always use caution when working with power tools, wear safety goggles and use a dust mask.
Start with coarse grit sandpaper and work your way up to a finer grit if needed. Finish up by applying a coat of sealer or polyurethane to protect the wood from moisture damage.